Getting Started - Coworking Spaces
Senbee Connect helps you manage your customers, colleagues, and facilities in one place. This quick guide walks you through the basics so you can get up and running fast.
Written By Tristan White
Last updated 10 months ago
1. Create Your PIN Code
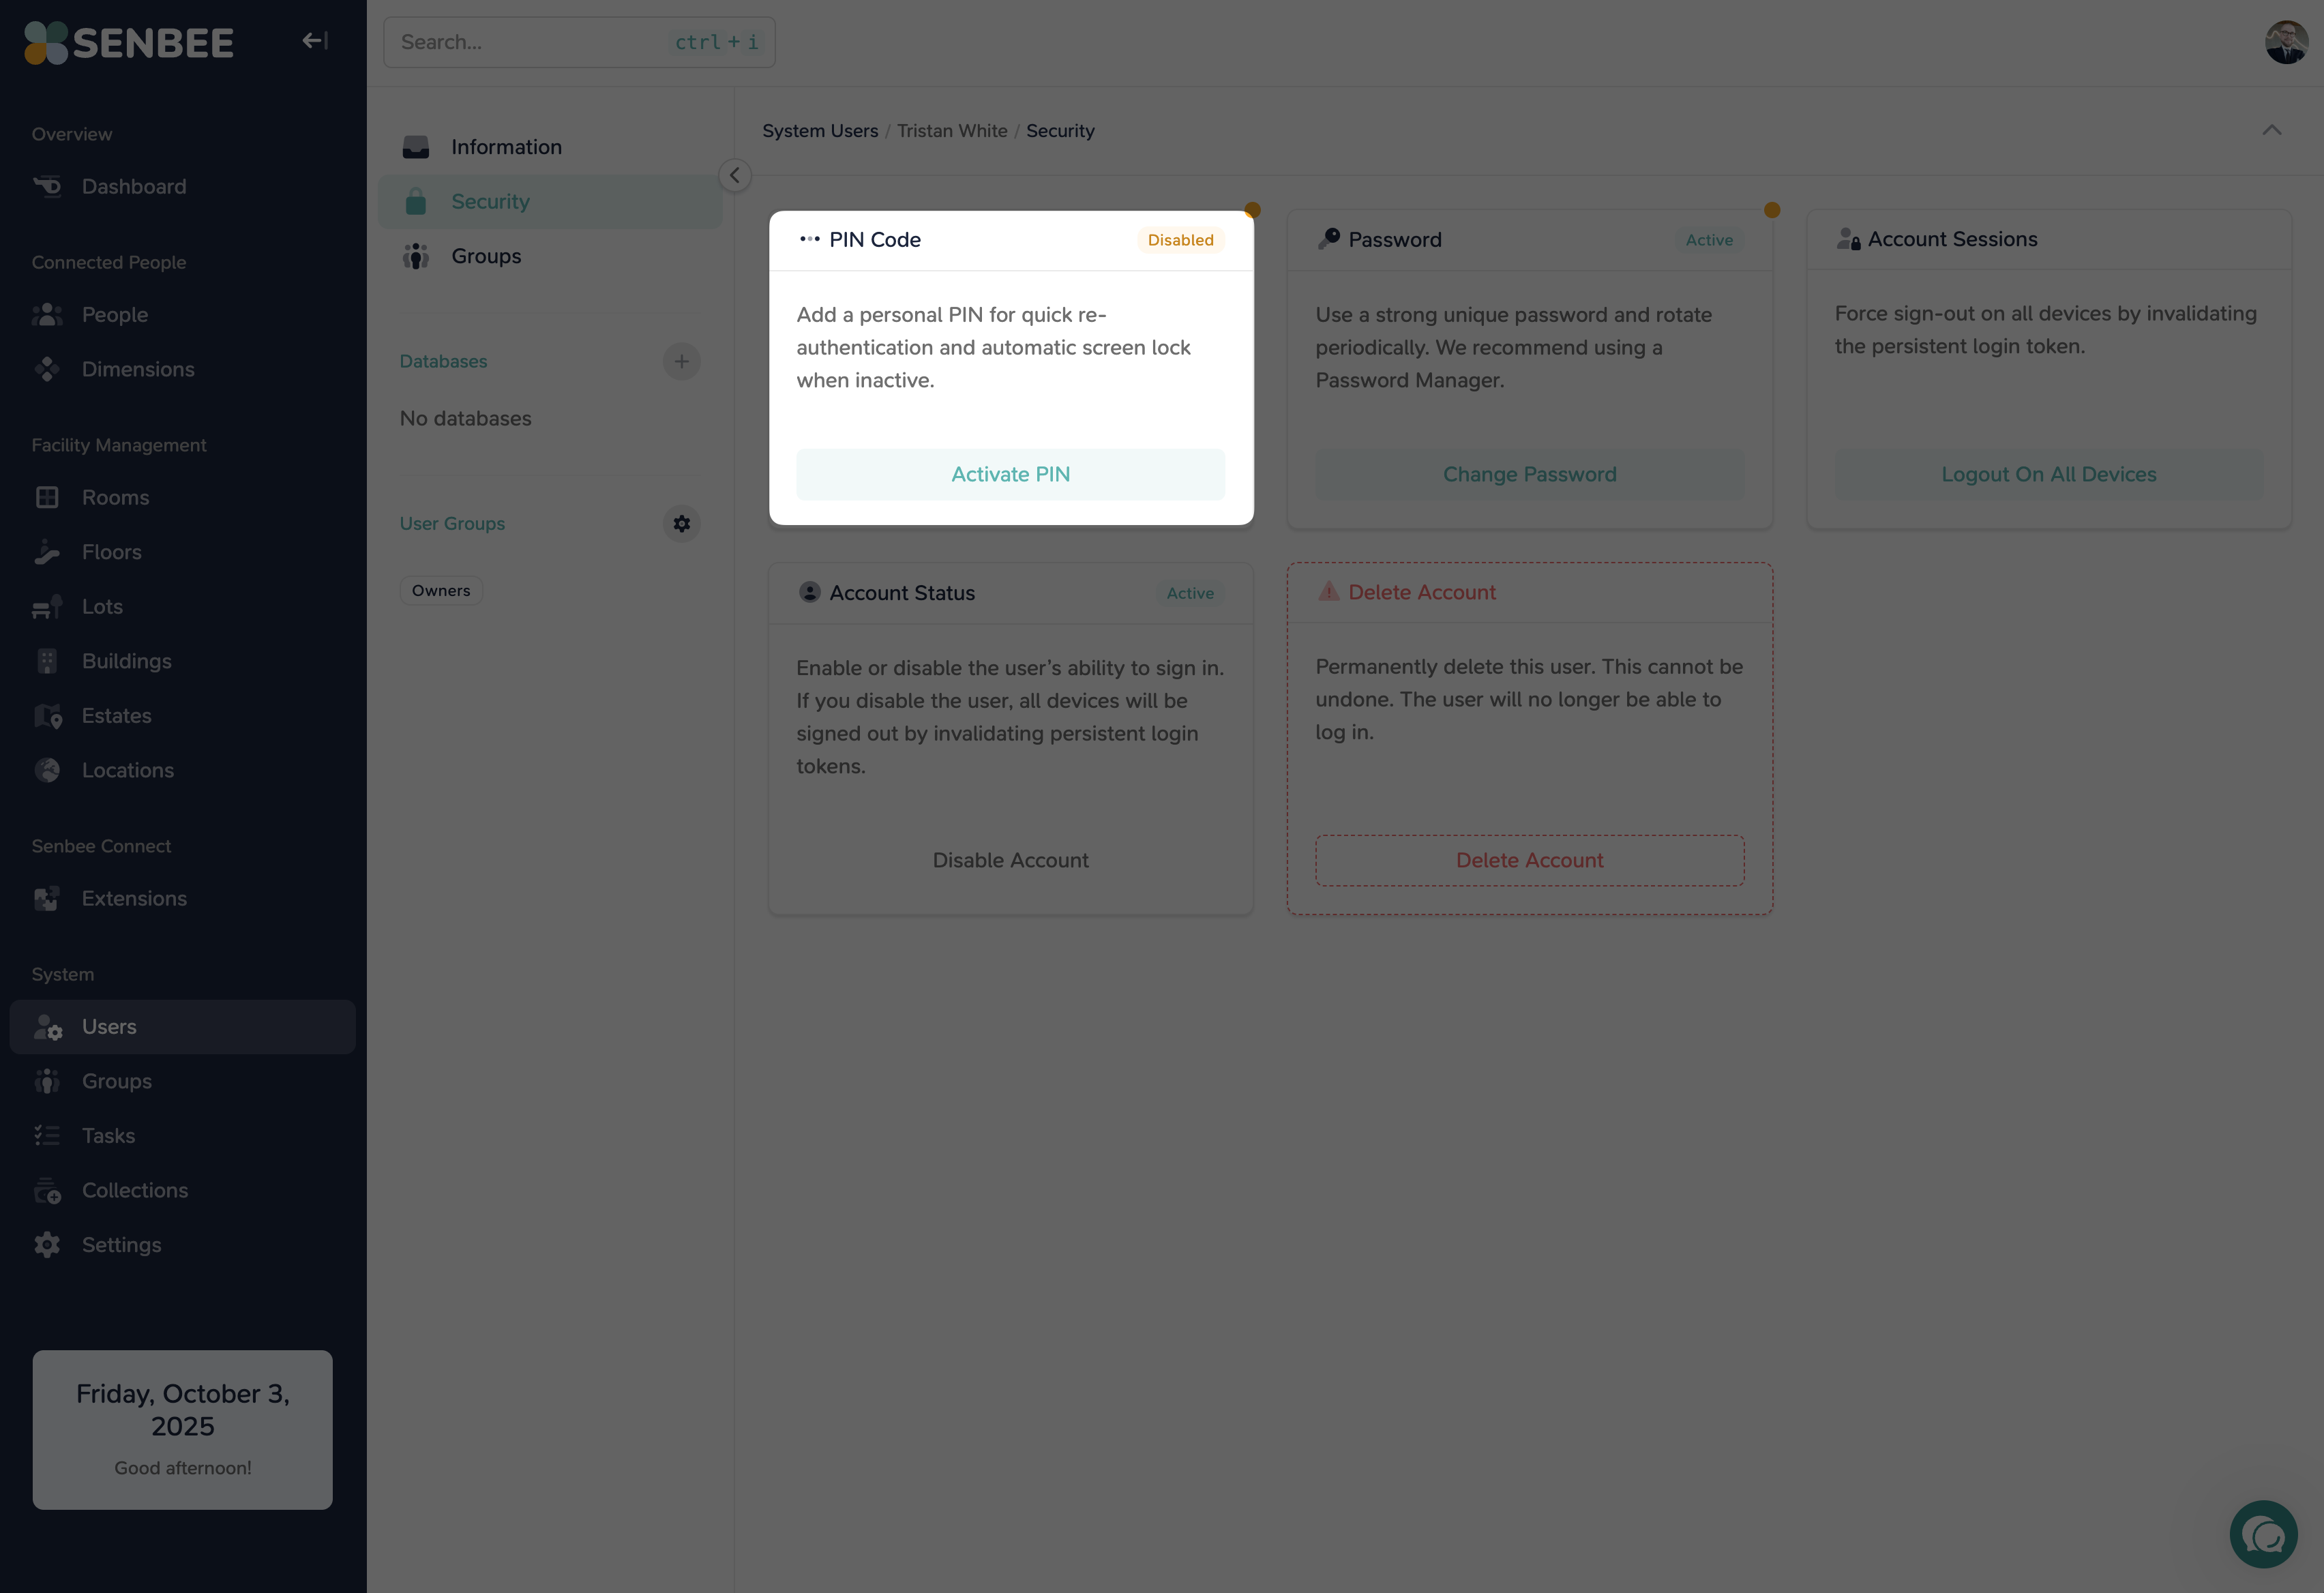
Your PIN code adds an extra layer of security to your Senbee Connect account. Once it’s set up, your sessions will automatically lock after inactivity, and you’ll use your PIN both to unlock quickly and to confirm sensitive actions.
How to set it up:
In the left-hand menu, scroll down to System → Users.
Select your own user account from the list.
In the fold-out menu, click Security.
Under PIN Code, click Activate PIN.
Type your new PIN and confirm.
That’s it — your PIN is now active 🥳
What happens next
Automatic Lock: If you’re inactive for a while, your session will lock itself. Just type your PIN to jump back in.
Confirm Actions: Some actions in Senbee Connect, like sensitive updates, require PIN confirmation to go through.
💡 Learn more about managing users and permissions here: User Management Help Guide
2. Create Your First Customer
Customers are at the heart of your coworking community. In Senbee Connect, a customer can be a company renting desks or an individual booking a space. Every person you add will be connected to one of these customers.
How to set it up:
In the left-hand menu, go to Connected People → Dimensions.
Click + New Dimension.
For Dimension Type, choose Company.
Enter the name of the company and, if relevant, a short description.
Click Create Dimension.
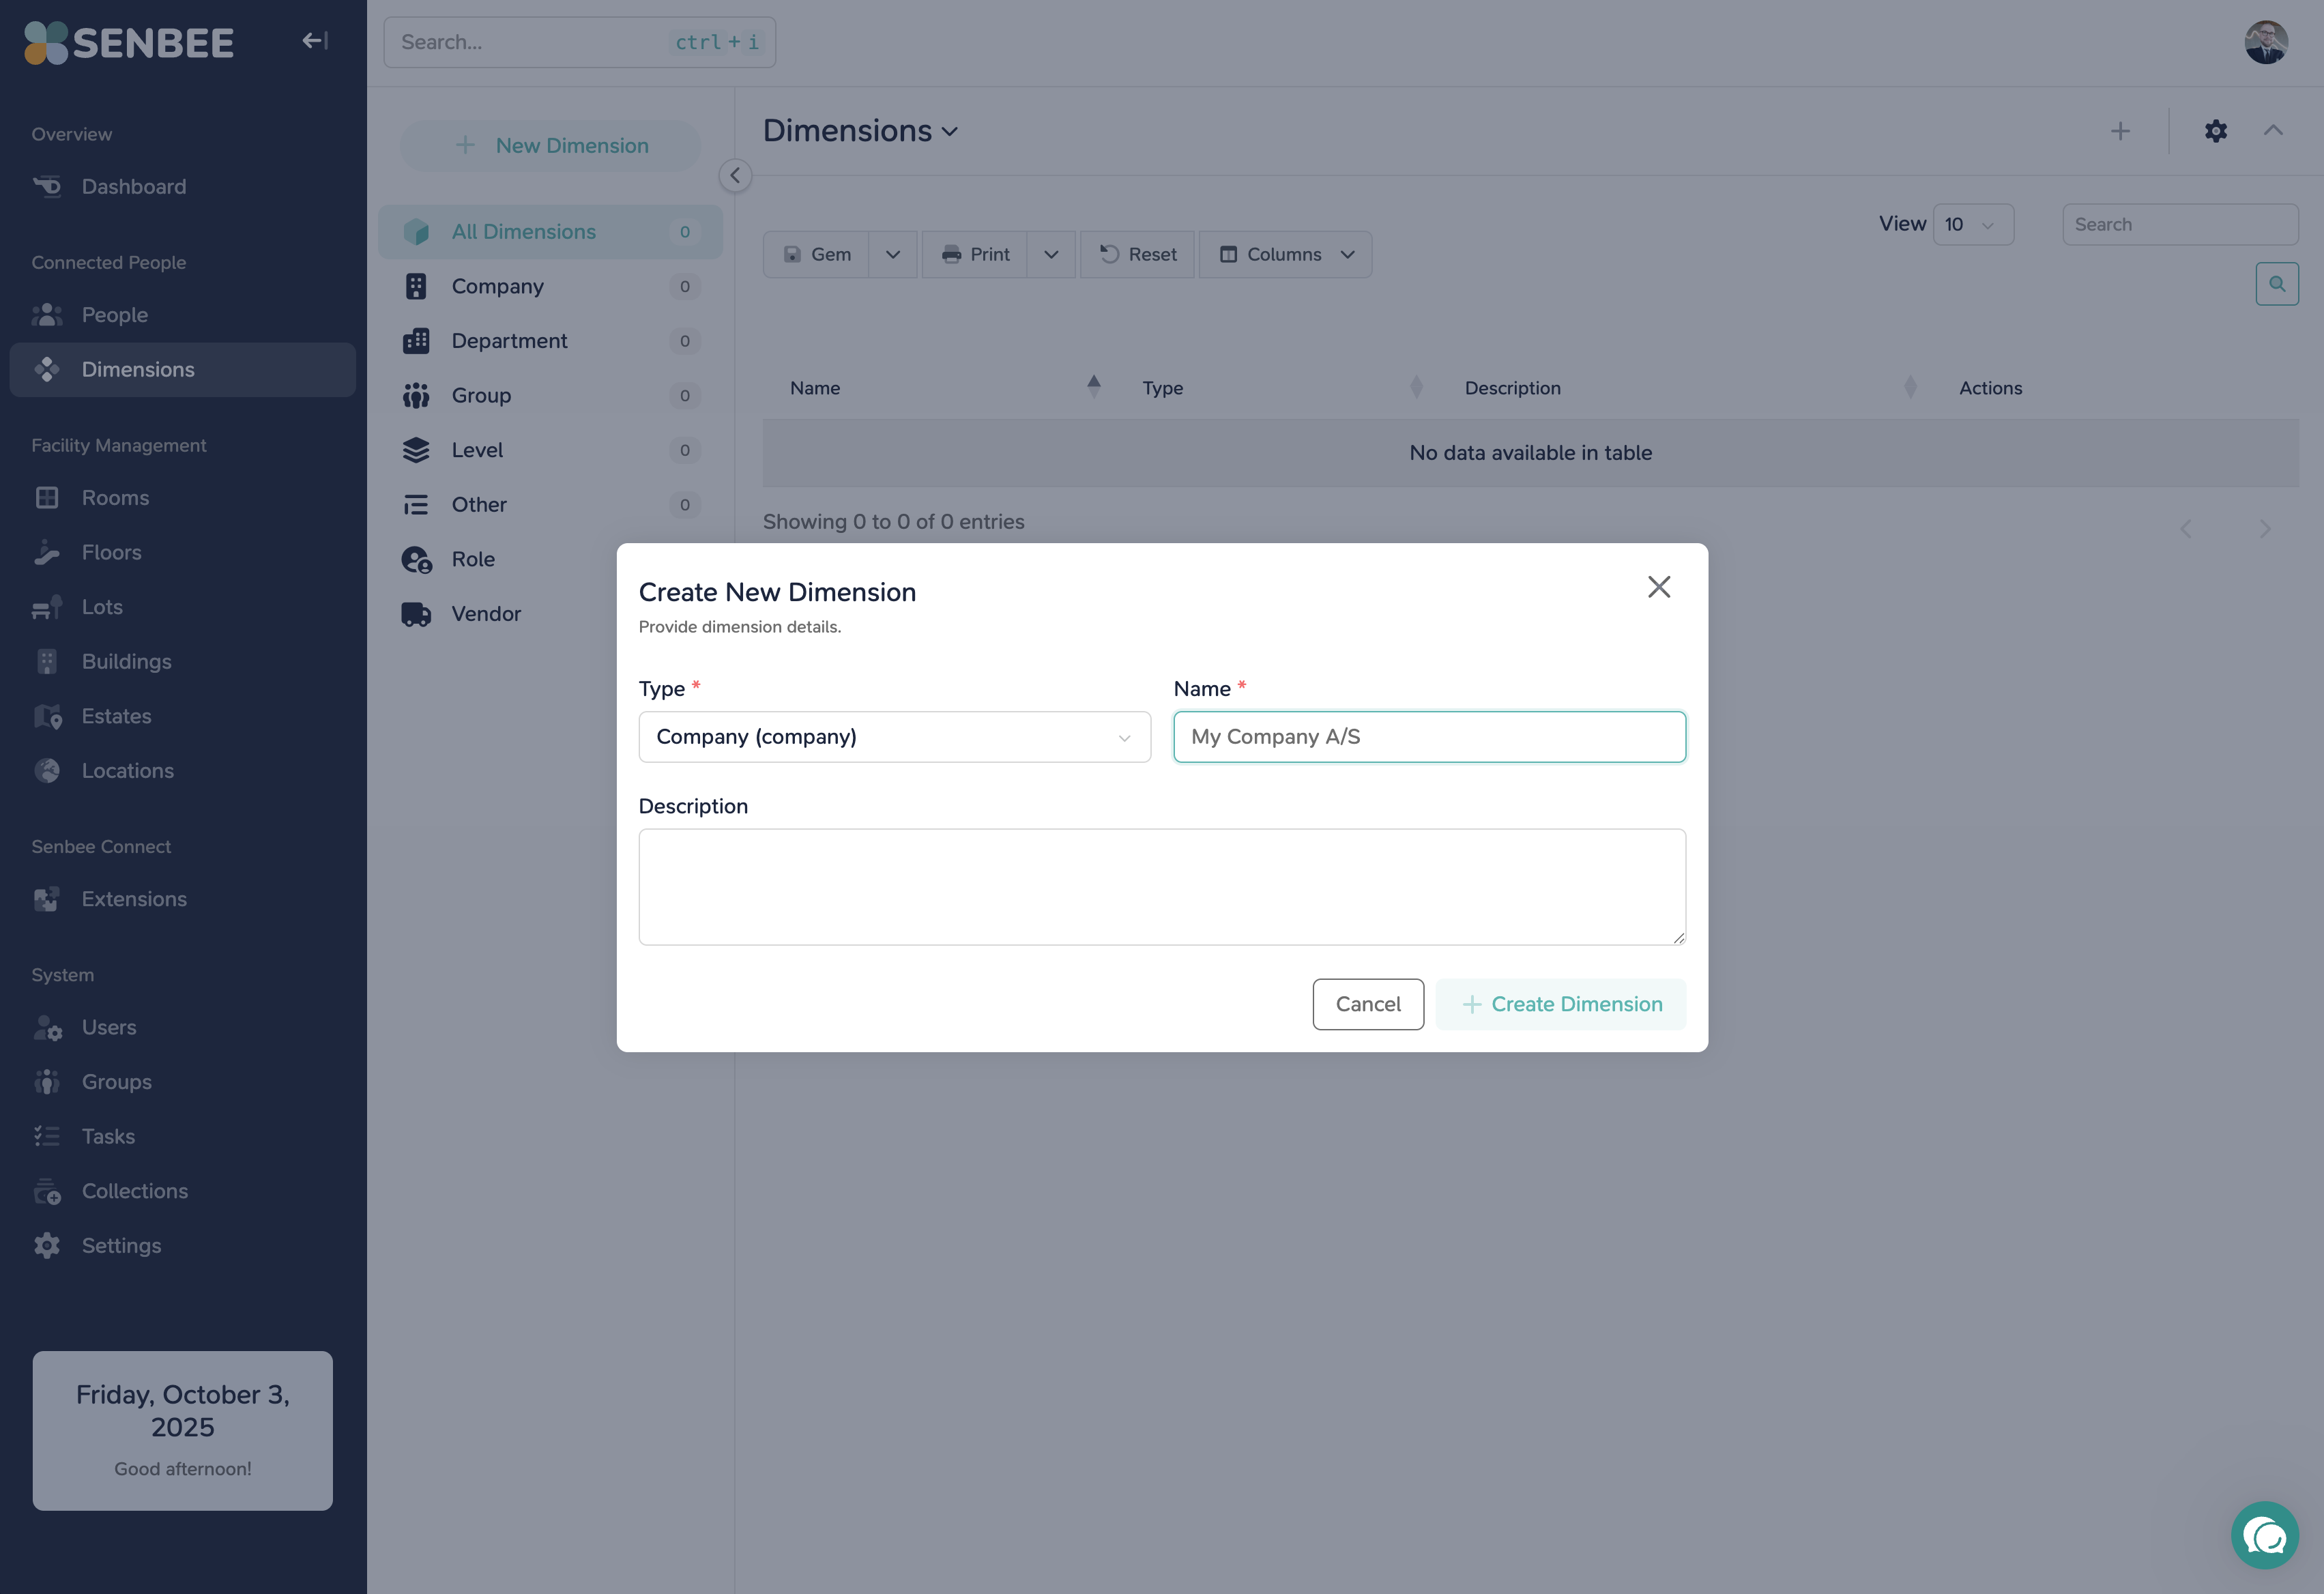
Your new company now appears in the list.
What happens next
Open the new company to add additional details, such as contact information.
You can now attach people to this customer, building up your coworking community profile.
💡 Curious to know more about Dimensions and how Connected People work? Read more here: Connected People Help Guide
3. Create Your First Person
People belong to customers — think employees of a company in your coworking space. Once you’ve created your first customer, you’re ready to add their people.
How to set it up:
Navigate to Connected People → People.
Click Add New Person in the top-left corner.
Fill in the person’s details, including name, email, role, and login information.
Click Create Person. The new person will now appear in the list.

Attach the person to a company
Select the newly created person.
In the left-hand fold-out menu, click the + icon under Dimensions.
Search for and select the customer (company) you want to link them to.
Click Attach Selected.
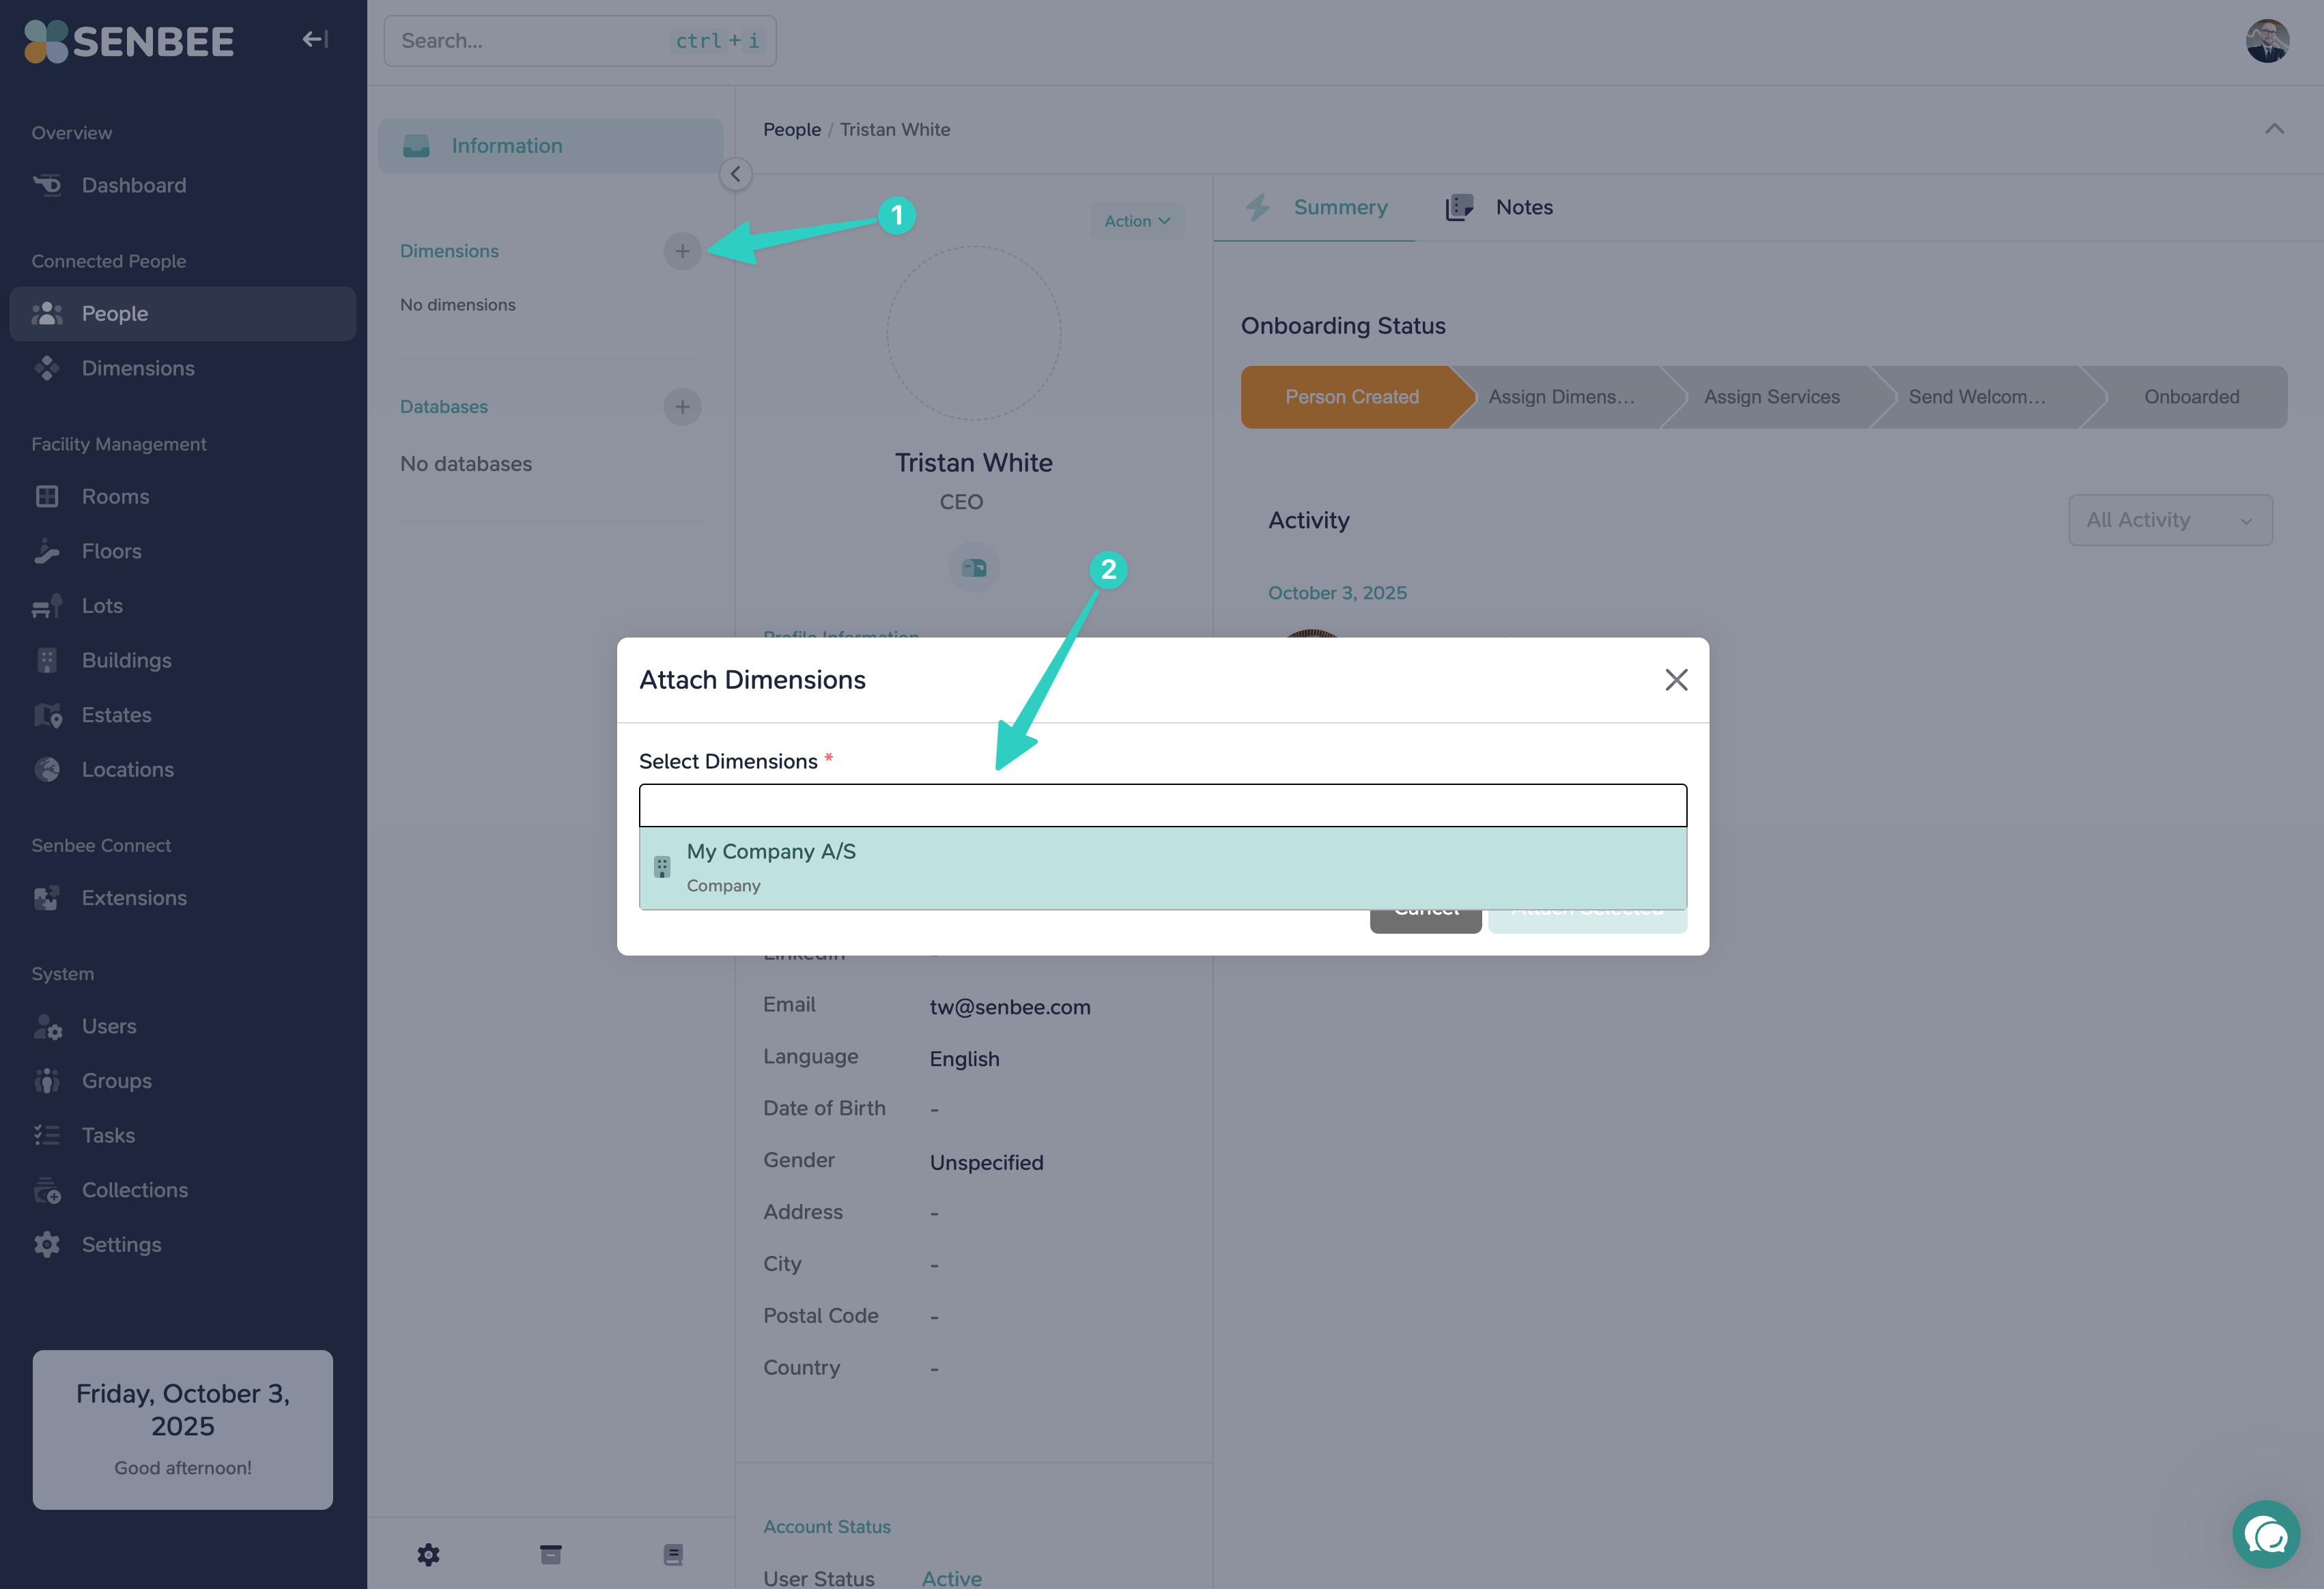
The person is now connected to your customer and ready to use Senbee Connect.
What happens next
You can continue to add more details (job title, phone number, LinkedIn, etc.) as needed.
Once attached, people automatically become part of your coworking community structure, making it easier to manage access, roles, and services.
💡 Curious to know more about People and how Connected People work? Read more here: Connected People Help Guide
4. Invite Your Colleagues to Senbee Connect
You don’t have to run everything alone. Bring your team into Senbee Connect so they can help manage customers, people, and facilities with you.
How to set it up:
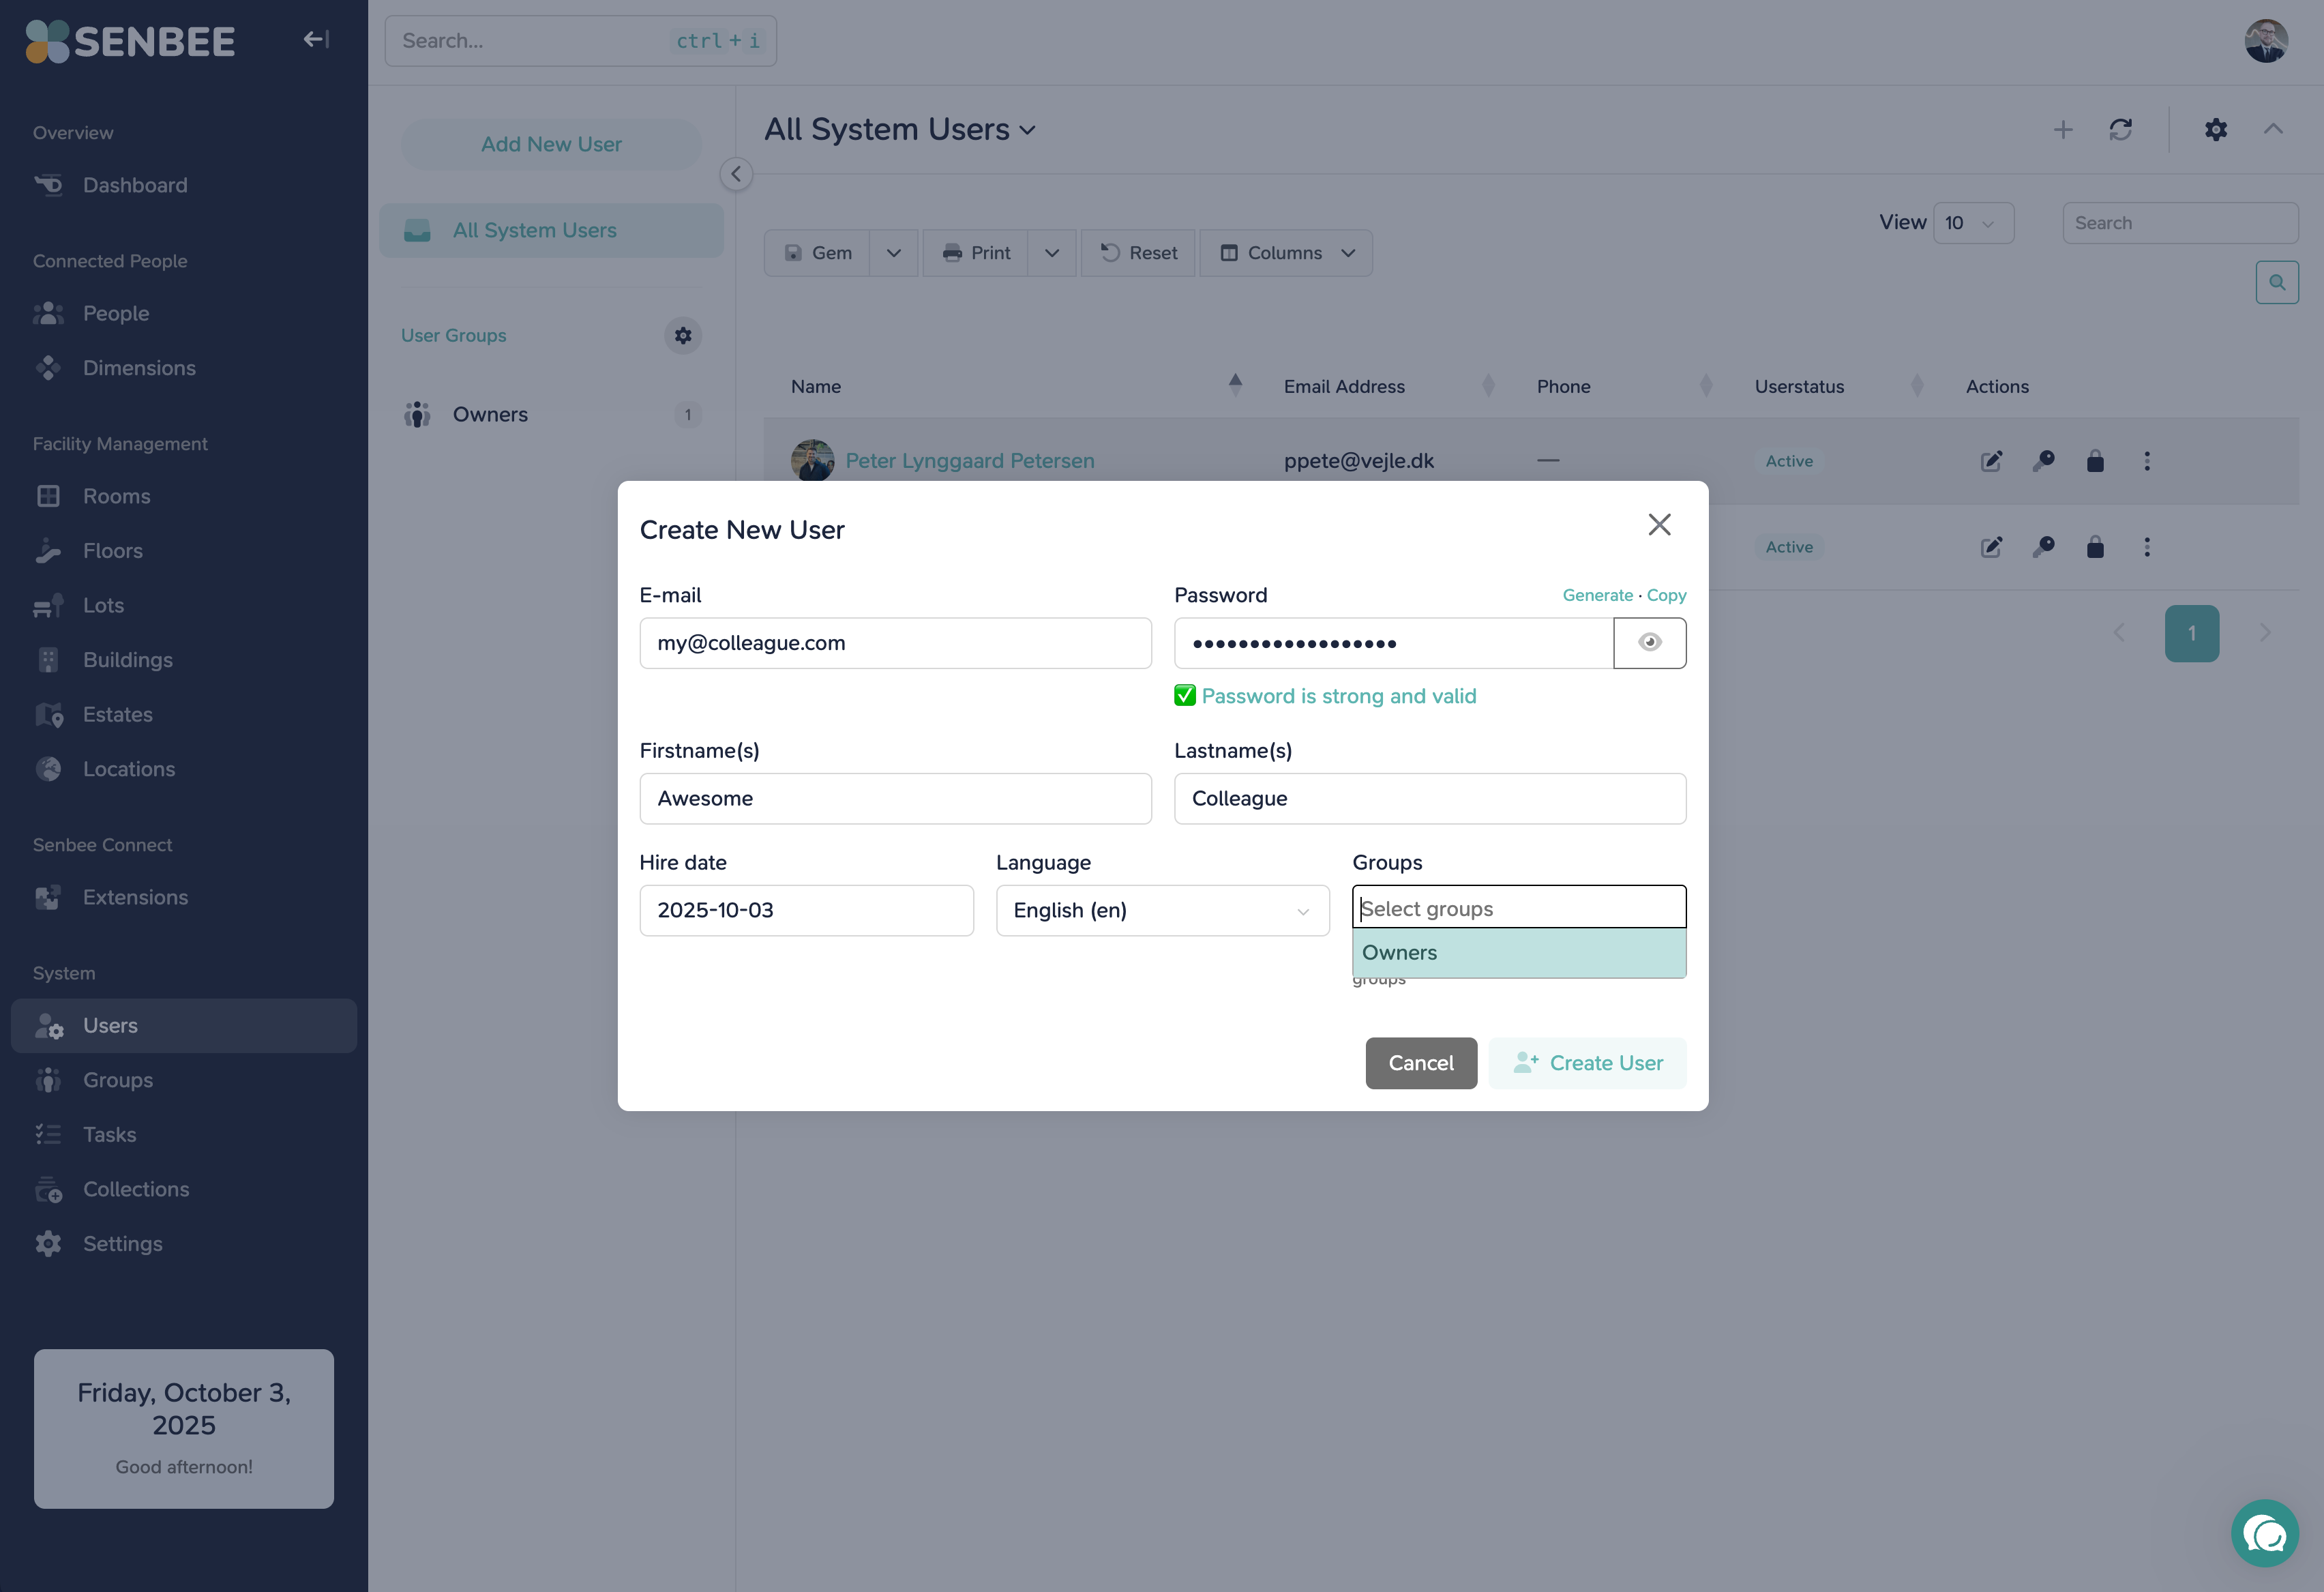
In the left-hand menu, go to System → Users.
Click Add New User in the top-left corner.
Fill in the details:
E-mail (used for login)
Password (note or copy this for your colleague, since automatic email invites are coming in a future release)
Name and language settings
Groups (optional: assign them to a group, e.g. “Owners”)
Click Create User.
The new colleague now appears in the list of system users. They can log in immediately using the email and password you provided.
What happens next
Once logged in, your colleague can create their own PIN code for quick access.
You can manage their rights later by assigning them to different Groups under System → Groups.
💡 Learn more about managing users and permissions here: User Management Help Guide
5. Get Started with Facilities
Facilities in Senbee Connect cover everything from rooms and floors to parking lots and campuses. This is where your coworking space becomes organized and ready for members to use.
How to set it up:
In the left-hand menu, go to Facility Management.
Add your spaces step by step — Rooms, Floors, Buildings, and so on — in their respective sections.
Once created, you’ll be able to connect customers and people to these facilities for bookings, access, and management.
Facility types explained
Locations – General areas (e.g. country, region, or city).
Estates – Larger land areas or campuses at a location, containing lots and buildings.
Buildings – Physical structures within an estate, such as offices, warehouses, or garages.
Floors – Levels inside a building.
Rooms – Defined spaces like offices, labs, or meeting rooms.
Lots – Outdoor areas such as parking, bike storage, or recreational spaces.
💡 Want the full overview? Learn more here: Facility Management Help Guide
6. Import Your Data
If you already have existing data — lists of companies, people, or rooms — you don’t need to start from scratch. Senbee Connect includes an Import Data tool that lets you upload your information directly from a CSV file.
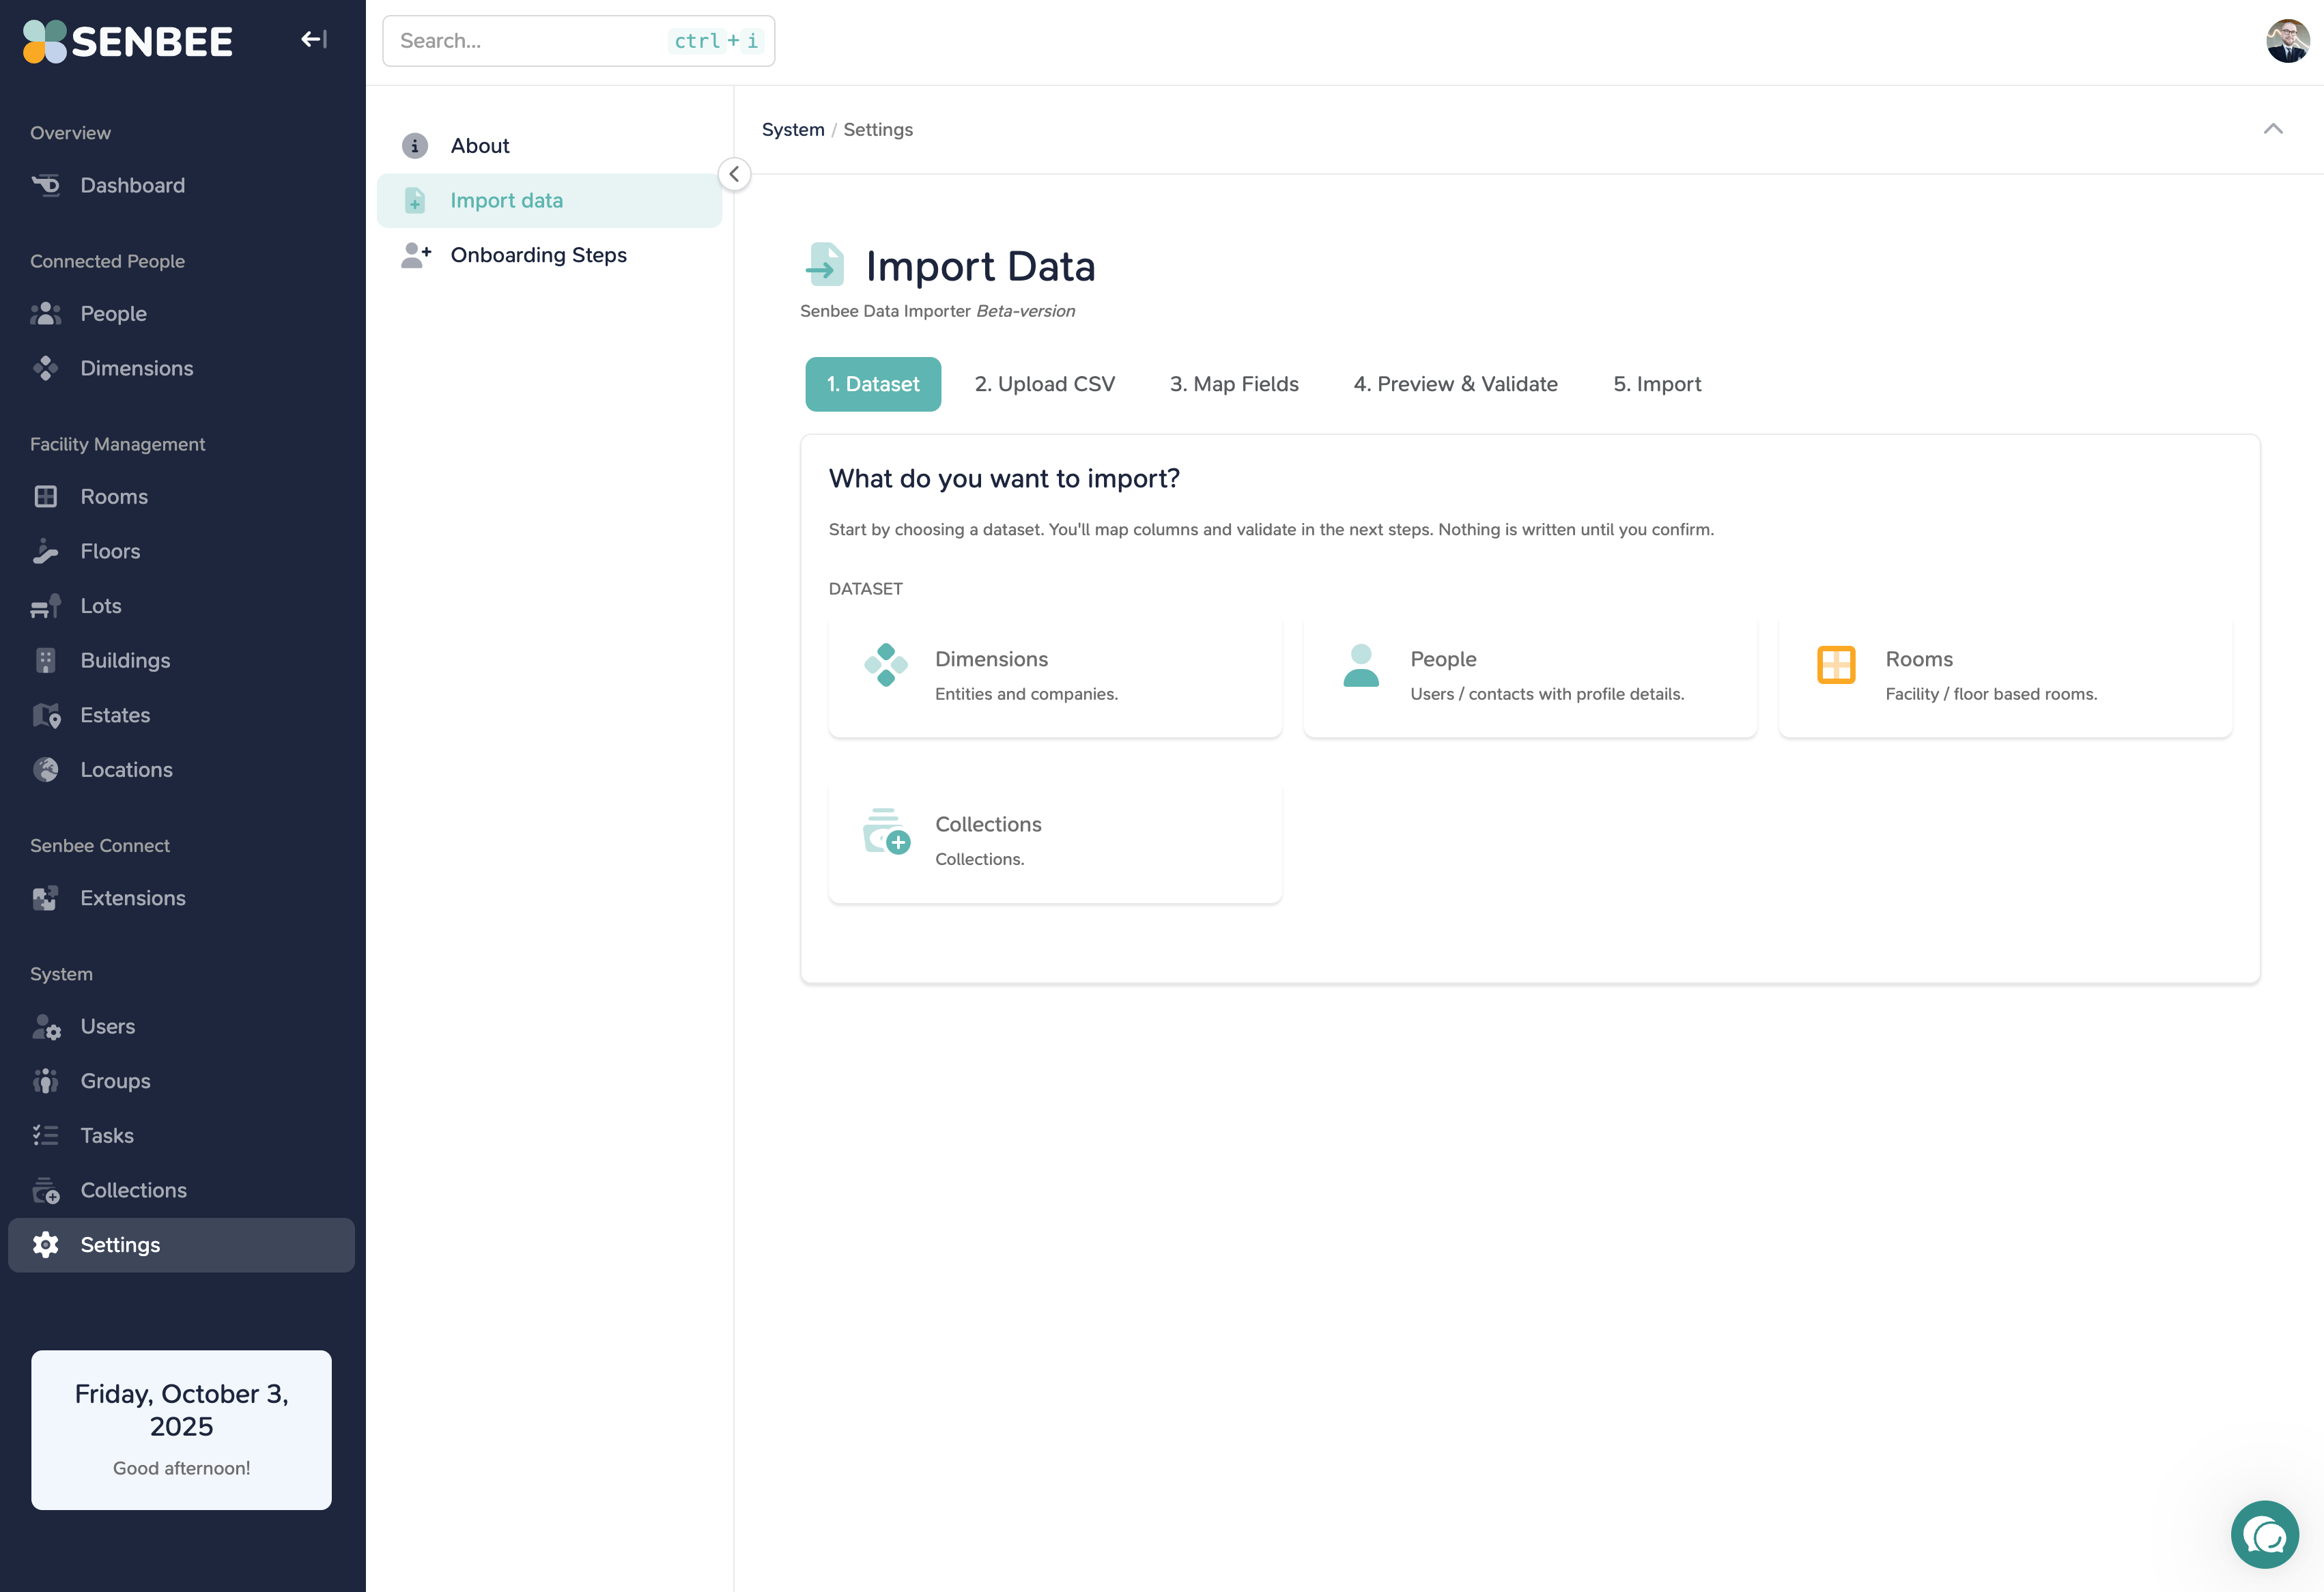
💡 Want to dive deeper into the importer? Learn more here: Import Data Help Guide
7. Extend Senbee Connect
Senbee Connect doesn’t stop with the basics. You can add powerful features through the Extension Store, tailoring the platform to fit your coworking space’s needs.
How it works
Some extensions are plug-and-play: just activate them and start using right away.
Others require setup and configuration, sometimes with the help of a Senbee partner to get everything connected.
Examples of what you can extend
Access Control – Manage who can enter buildings, floors, and rooms.
Notifications – Keep members updated with automated messages.
Parking Management – Organize lots, bike storage, or charging stations.
ESG Tracking – Monitor and report environmental performance.
Next Steps
You’ve completed the basics — created your customers and people, set up facilities, and even explored extensions. Here are a few useful resources to help you go further with Senbee Connect:
Help Center – Step-by-step guides and articles for all features: Help Center
Roadmap – See what’s coming next and follow new features: Product Roadmap
Trust Center – Security, compliance, and legal documentation: Trust Center
Changelog & Support – Access release notes and open support tickets directly through the chat widget in the bottom-right corner of Senbee Connect.
Pro tips
Encourage your colleagues to set up their own PIN codes right away — it makes day-to-day use much faster.
Start small with facilities and extensions, then expand as your coworking community grows.
Keep an eye on the changelog to stay up to date with improvements.